Marc Forster’s World War Z may have had a slightly turbulent trip to the big screen – it’s third act was re-worked at high cost – but the benefits have been clear, with a successful opening weekend and praise as a new kind of zombie film. A swathe of visual effects artists, led by effects supervisor Scott Farrar, helped realize the undead. We sat down with four of the show’s vendors to discuss their key contributions:
1. The zombies take the US: Cinesite
2. From Israel to Cardiff: MPC
3. Scanning, 3D data capture and modelling: 2h3D and 4DMax
4. Stereo conversion: Prime Focus
2. From Israel to Cardiff: MPC
3. Scanning, 3D data capture and modelling: 2h3D and 4DMax
4. Stereo conversion: Prime Focus
- See how MPC created the digital zombies for the dramatic Jerusalem sequence, in this exclusive video from our media partners at WIRED.
1. The zombies take the US: Cinesite
World War Z begins in Philadelphia where former United Nations worker Gerry Lane (Brad Pitt) is stuck in heavy traffic. Suddenly a large garbage truck takes out a police motorcyclist and the many cars around him. Gerry catches a glimpse of strange behavior as hordes of people escape what seem to be other crazed humans – soon revealed as zombies whose bites pass on these same characteristics. Escaping to a New Jersey rooftop, Gerry and his family are dramatically rescued by helicopter and taken to a flotilla of vessels off the coast, as cities burn and many more people are attacked and become zombies. Gerry then begins a worldwide journey, starting in Korea, to look for the source of the zombie outbreak. Cinesite handled effects for these sequences.
The garbage truck
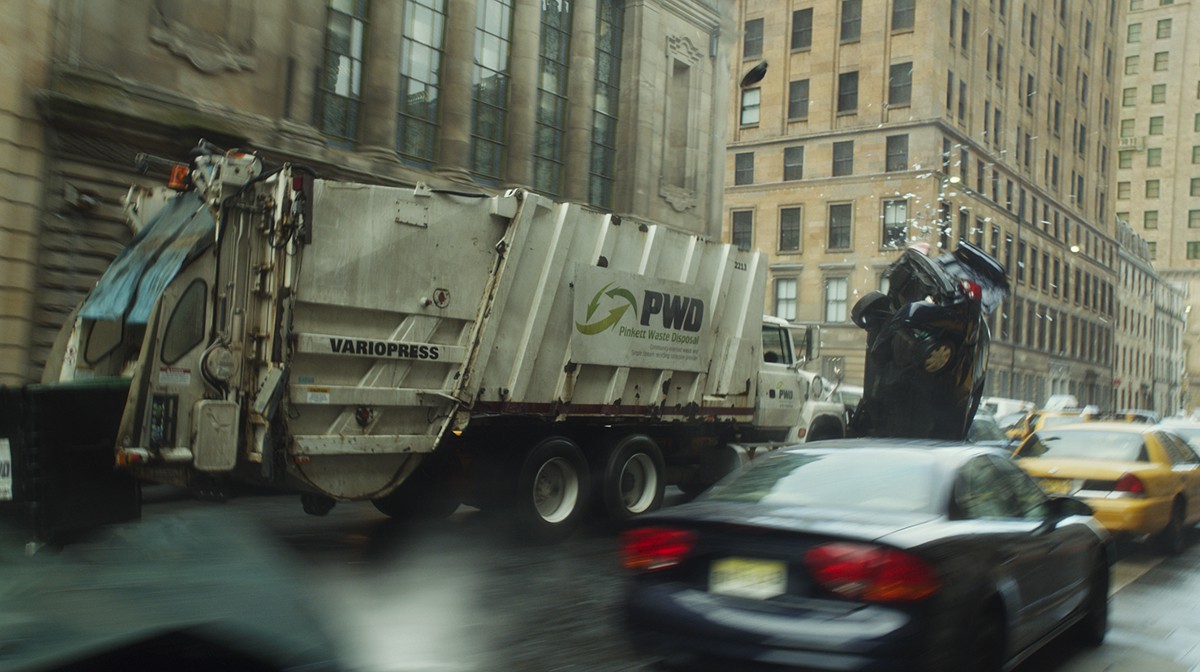
A garbage truck slams through traffic.
Scenes set in Philadelphia were filmed in Glasgow, Scotland. For the garbage truck shot, which is seen from inside Gerry’s Volvo and follows the truck as it ploughs through the cars, multiple plates came together to complete the startling scene. “Simon Crane, the second unit director, wanted to do both the stunts and shoot the plates at the same time,” says Cinesite visual effects supervisor Matt Johnson. “So what we had to do was work out a way to make this possible, because normally when you do plates like this you have a tracking vehicle and use say camera arrays. We couldn’t do this on this show because we had to shoot the plates the same time we were shooting the vehicle.”
To make it possible, Johnson and second unit DOP Igor Meglic devised a way to fit four different static cameras inside Gerry’s Volvo to cover the field of view. “Those had to be wedged within the driving vehicle itself and then blacked out to be able to shoot through the glass,” explains Johnson. “So we had four overlapping cameras that, when stitched together, would make that field of view. We never actually pan in real life, the pan is a creation of the blending of the four plates together.”

So the final shot was made up a greenscreen plate of Brad Pitt, four plates combined for the garbage truck (with a CG replacement for its front section that has been shot with a ‘cattle catcher’), a policeman element, a dummy/mannequin element, background buildings, and a windscreen raindrop element “because I got obsessed with raindrops on windows,” admits Johnson.
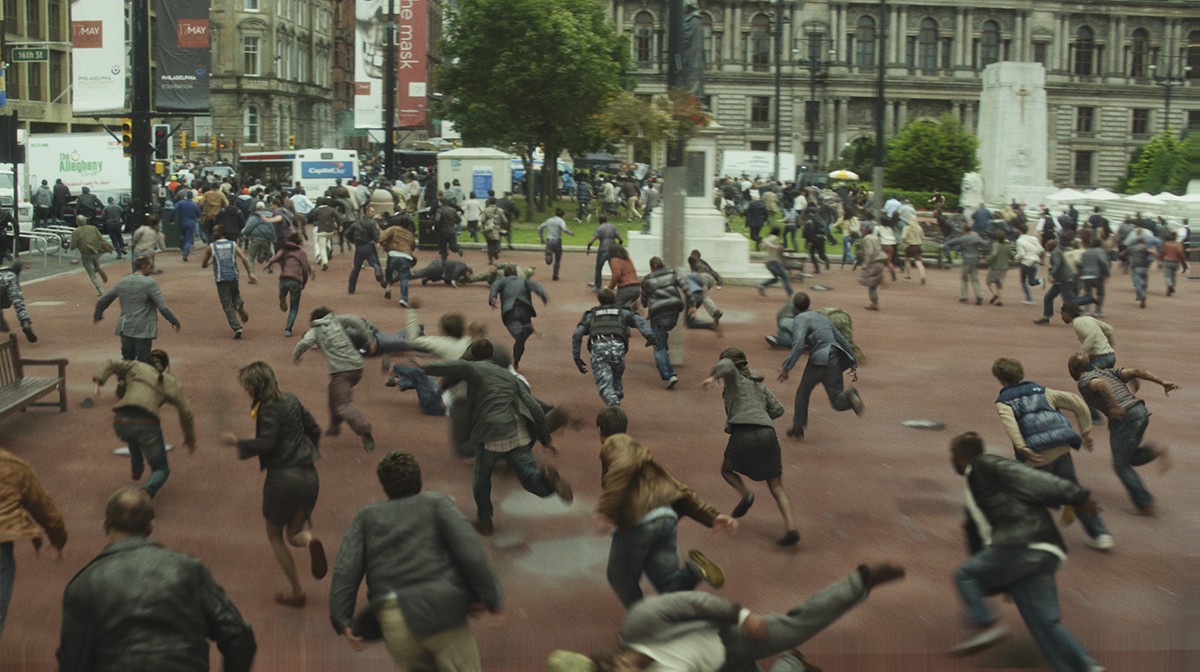
Zombies in Philly
As Gerry and his family retreat to the street, they see the zombies begin to attack others, and for the effects of their bite to take only seconds. Zombie actors were utilized on set in Glasgow and then highly supplemented with digital counterparts. Cinesite looked to reference from videos of attack dogs that would go straight fro the throat, and also sporting events such as rugby and NFL players for how humans leap.
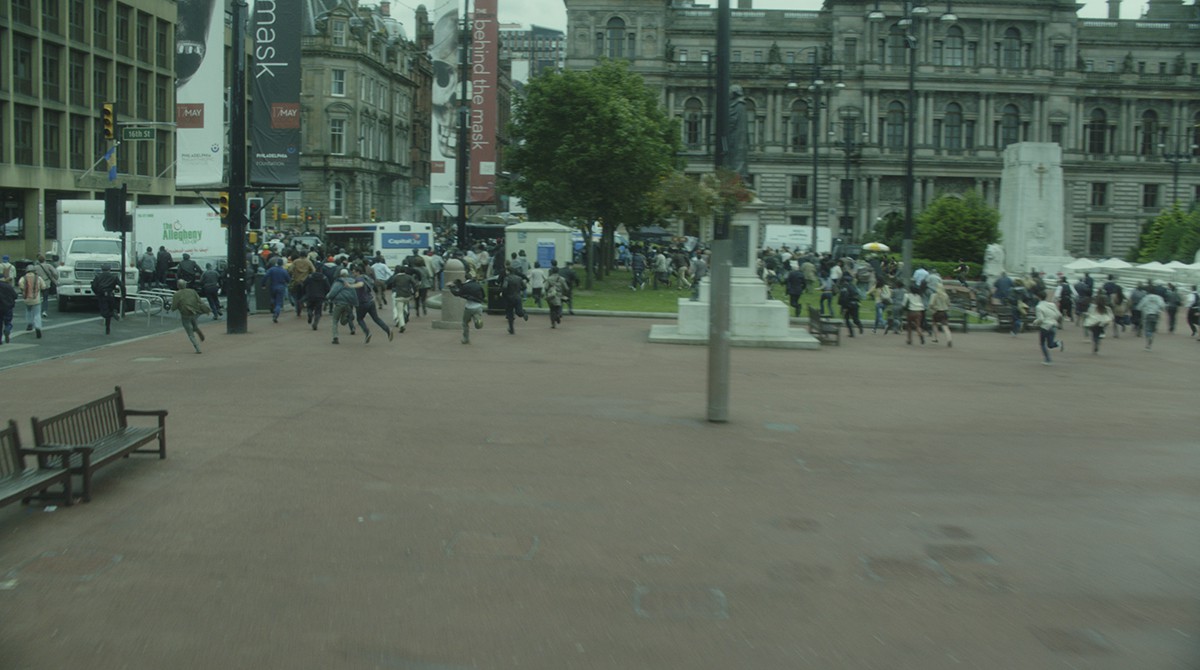
Background plate.
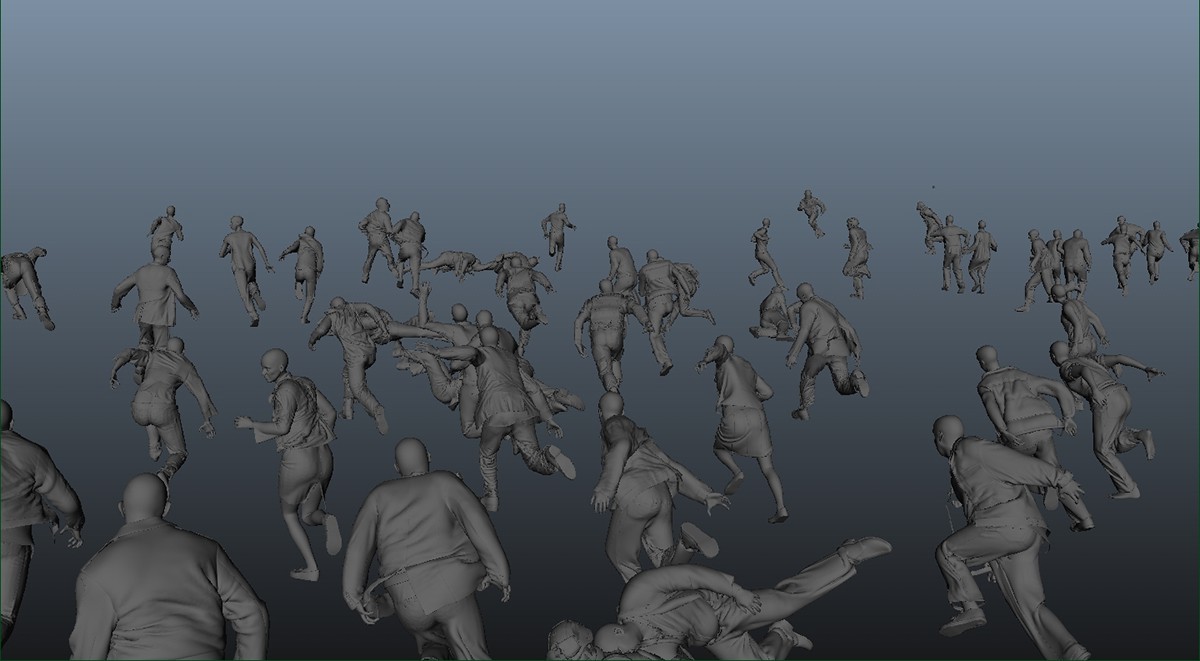
CG zombies.
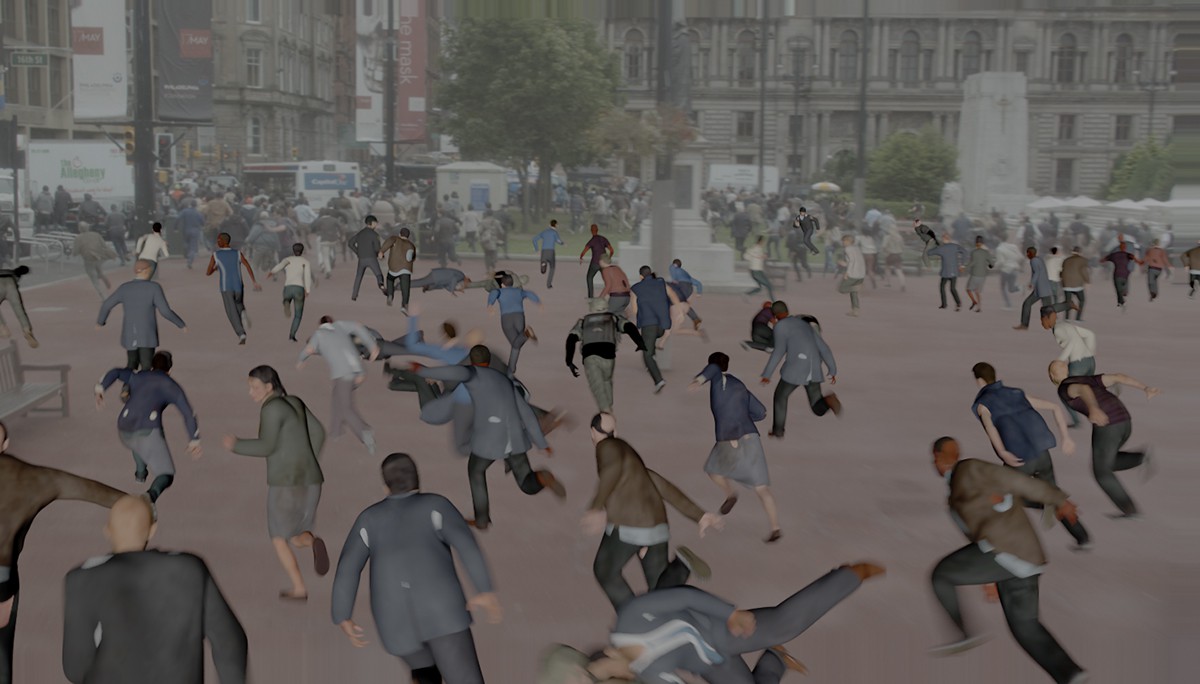
Animation on background.
Final shot.
“The interesting thing about when humans leap is,” notes Johnson, “there’s always some element of self-preservation however hard they’re going in – a tendency to go in with your arms or protect your head. We thought zombies wouldn’t care about that – they’d basically care about getting the bite in. But then we realized – if a stunt person does that, they’ll be dead. So that ended up becoming something we did in CG.”
Halon served as one of the main previs providers for World War Z, under the supervision of Previs Director Daniel Gregoire and supervisor Bradley Alexander. The team used a portable V CAM System on set to imagine scenes, also relying on mocap, virtual camera, MotionBuilder and Maya for previs and postvis work.
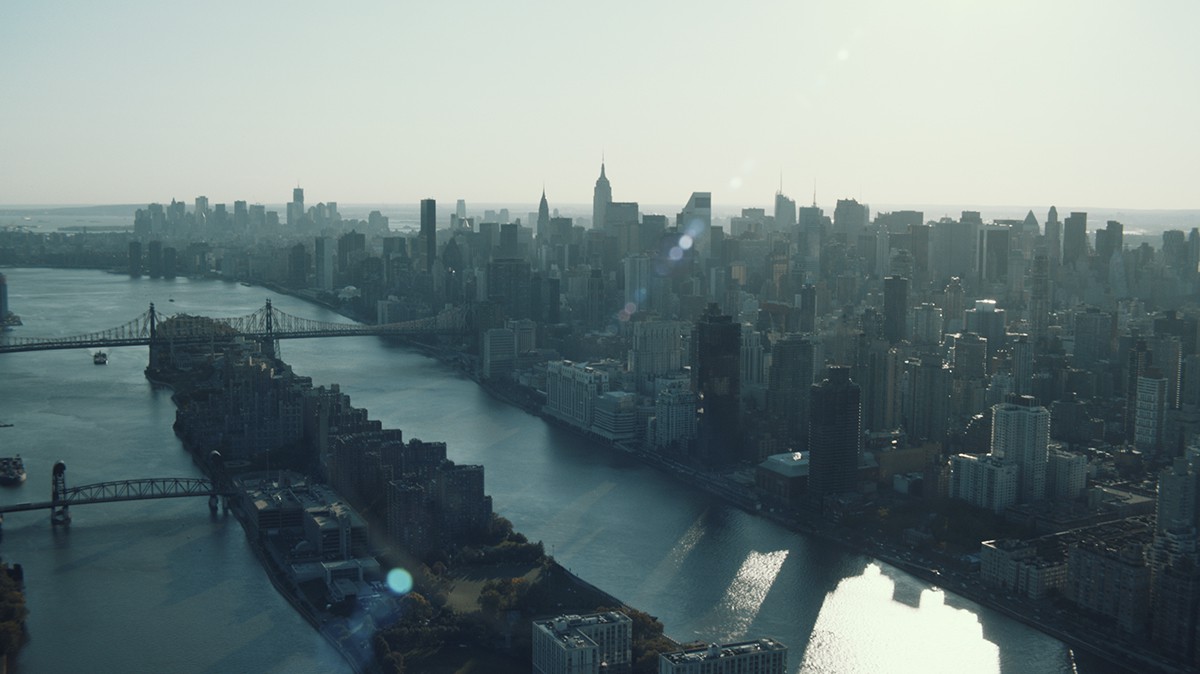
In addition to ground level scenes, Cinesite also completed several aerial shots for the film. Original plate.
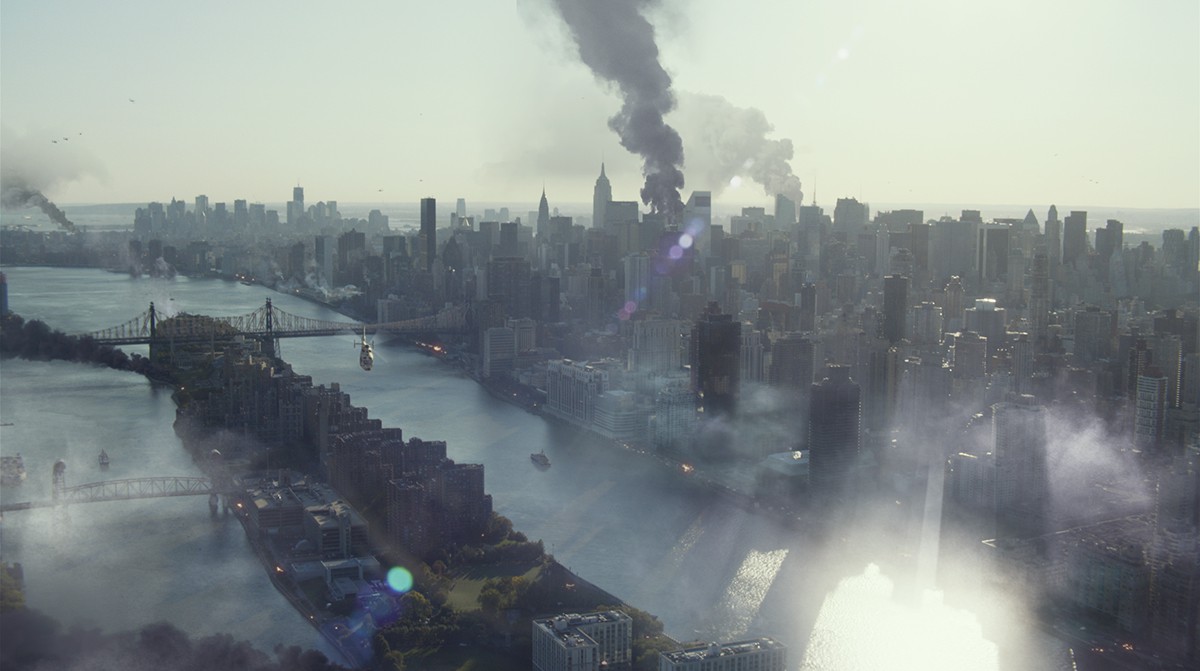
Final shot.
Cinesite’s stereo conversion
In addition to its VFX work, Cinesite completed around 400 shots of stereo conversion under stereo conversion supervisor Angus Cameron.
Head of VFX Technology at Cinesite Michele Sciolette explains: “We developed a hybrid approach that allows us to have the flexibility of disparity grading techniques with the consistency and spatial coherency of a 3d geometry-based approach: we use accurate 3d geometry and camera tracking data to generate spatially correct depth maps that provide the basis for the image based part of our pipeline.”
For digital zombies (and several humans), Cinesite developed a pipeline based on scans of actors on the set. “We had a system where I was given cards,” says Johnson, “and if I wanted somebody to be scanned or photographed I would tick this little box and I would hand the person this card which they would show to an AD and they would be taken off to this magical world of texture photography and scanning.”
Cinesite based their digital creations on concurrent work being done by MPC for the Israel sequences (see below), with the studio relying on a Maya/RenderMan pipeline, nCloth for cloth sims and Yeti from Peregrine Labs for hair. “We built 30 odd characters that were the human and the first stage of the zombies,” says CG supervisor Anthony Zwartouw. “We did a lot of internal work on our pipeline to push our cloth and our hair and also generally our lighting pipeline to achieve these characters. They had to serve as both crowd characters in their thousands but also close up. We also developed an interesting tool where we could take characters we’d sim’d in Massive and then upgrade them to do cloth sims and hair sims on top of it.”
Significant environment work to turn Glasgow into Philadelphia was also required. “It’s not quite as mad as it sounds,” jokes Johnson. “There are similarities between the cities, but we did a lot of building work, adding height to the Glasgow buildings and making geographical sense of the layout. Also, the film is very handheld and zoomy which became a huge tracking challenge. We mounted zoom encoders onto every camera – ARRI Alexas – and we also hard-mounted a fixed wide angle lense camera on everything to give us extra tracking information.”
The rooftop escape
With his UN connections, Gerry secures a chopper pick-up from atop a New Jersey apartment building. He and his family manage to just evade several zombies as the helicopter takes off and flies from the city to the flotilla of ships.
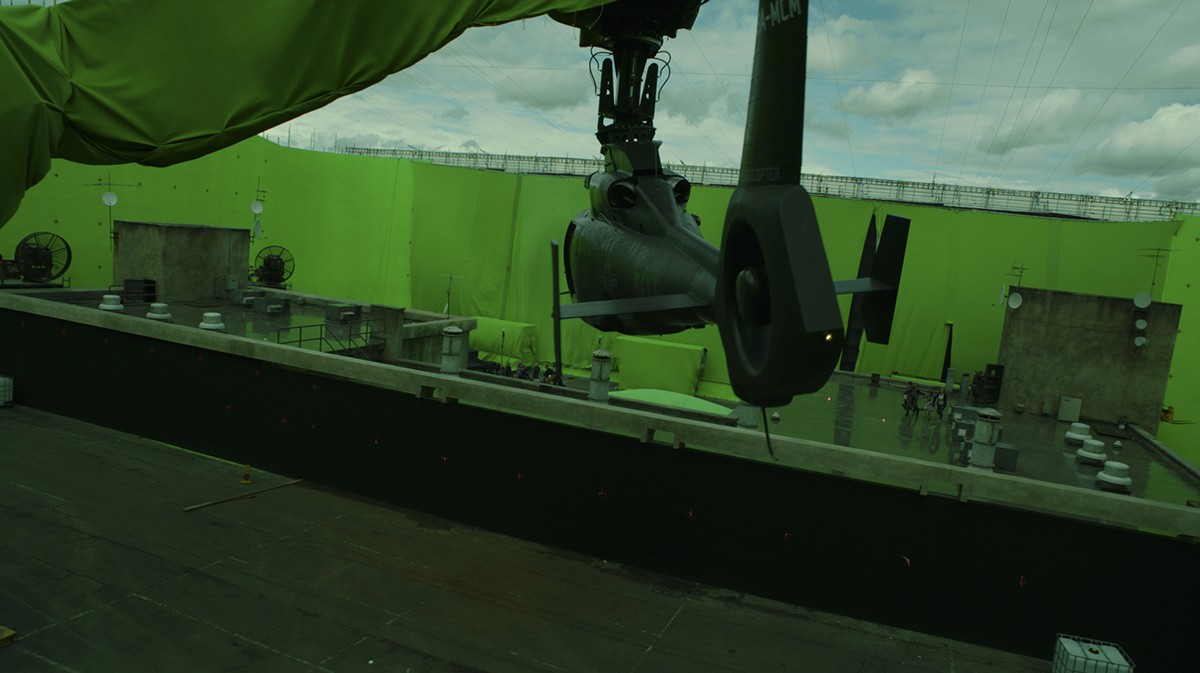
Greenscreen plate.
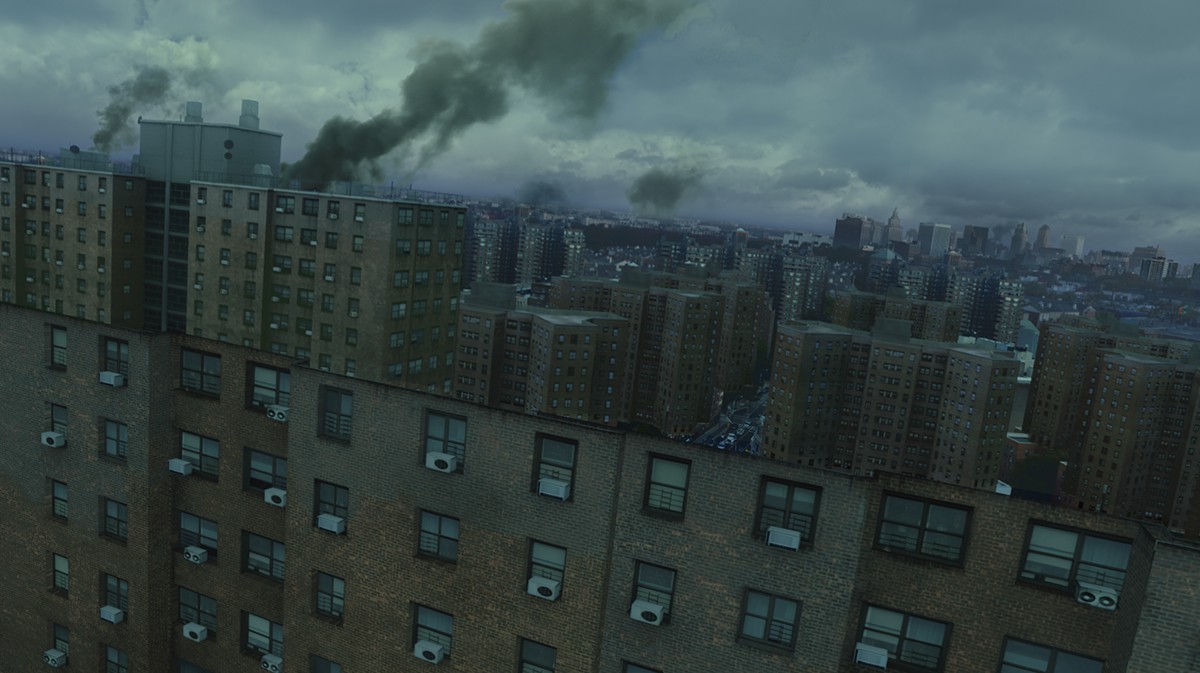
Background with added digital elements.
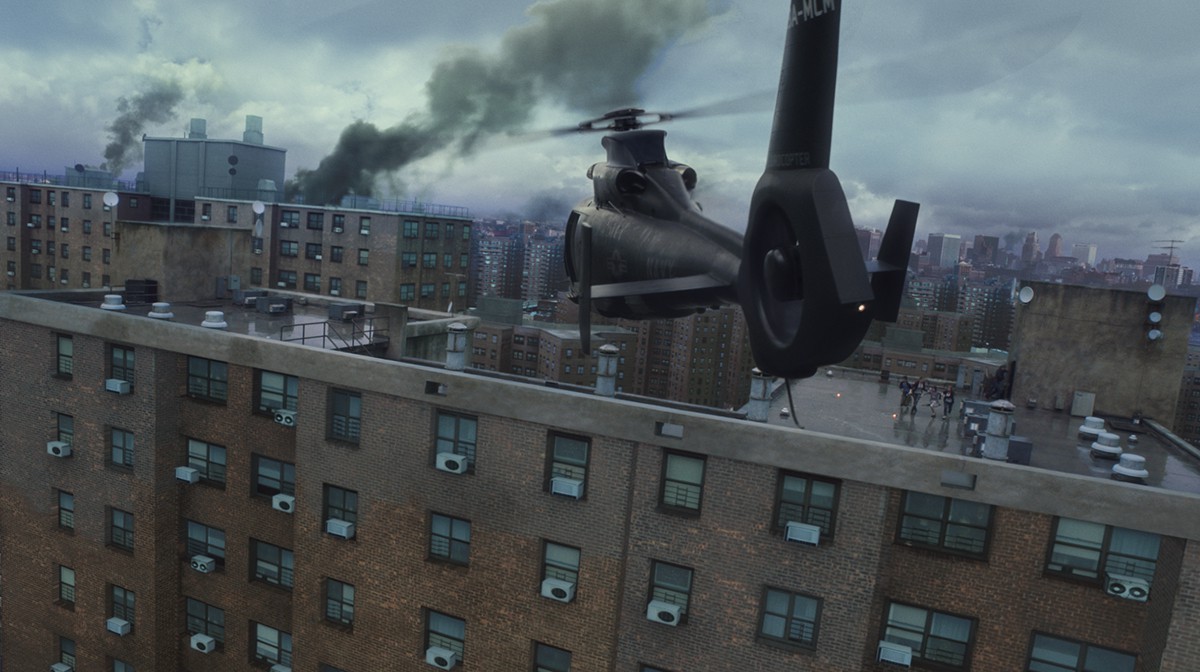
Final shot.
Plates for the rooftop were filmed on a soundstage in essentially a fully enclosed greenscreen box. Reference stills from Philadelphia and New York were then used to create backgrounds. “We basically made a virtual set and then photographed it with cameras within Nuke,” explains Johnson. “They shot also with a helicopter buck and then we added in the rotor blades. We’d make the puddles in the water wobble a bit and add in prop wash and venting of exhaust gases to make it feel as real as we possibly could, adding in things like chromatic aberrations and real lens flares.”
In the sequence, the zombies have no hesitation in launching themselves at the moving helicopter, even if it means falling several stories to the ground. Cinesite employed both live action and mocap’d zombie actors for these shots. “They actually went a little outside the box and had performance artists and ballet dancers and experimental dancers do some of the real and mocap performances,” says Johnson. “They can do the most freakishly weird things with their bodies. And then if they’re running towards the edge of a building – some of them are real and some are CG. And hopefully unless you see one plunging 500 feet below you won’t realize which one is which.”
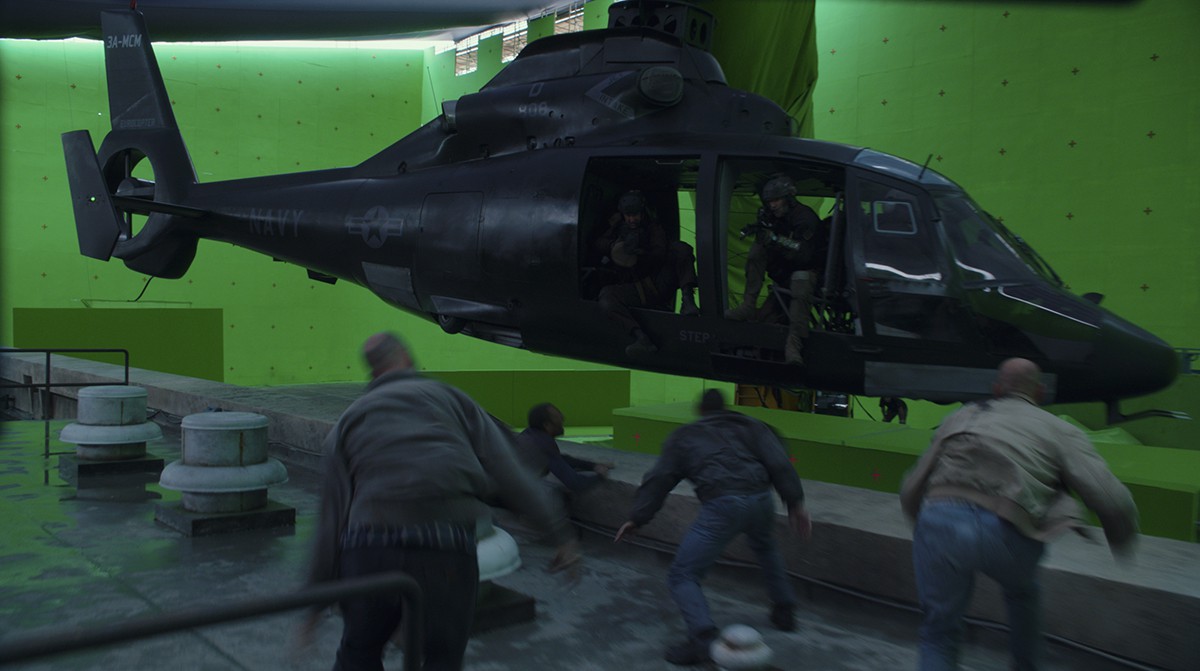
Original plate.
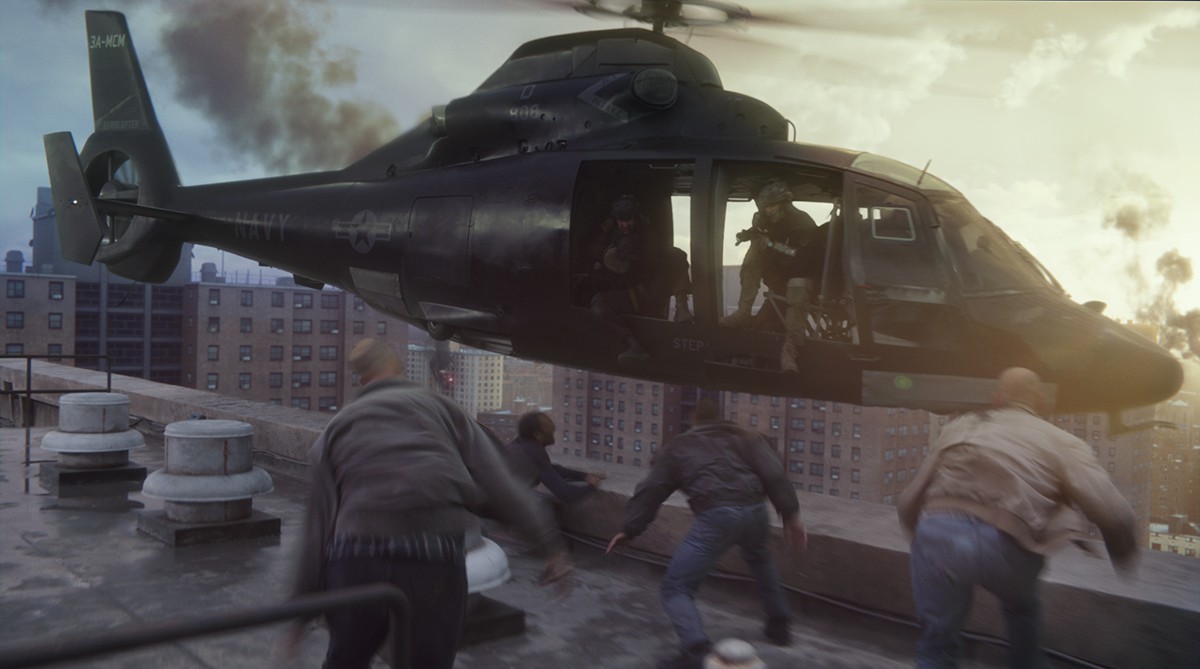
Final shot.
2. From Israel to Cardiff: MPC
Having set out on a mission to uncover the origins of the zombie plague, Gerry is led to Jerusalem – a city that has built a giant protective wall having had an inkling towards the impending doom. Unfortunately, due to the zombies’ being attracted to noise, and their new found ways of clumping together to form human-like ladders and pyramids, the breach the safe zone and wreak havoc on the city. Once again, Gerry must escape the zombies – at first attempting this unsuccessfully by helicopter but then via a passenger jet. This plane is re-directed to Cardiff, Wales to a WHO research facility in the hope of finding a zombie cure. But a stowaway zombie causes the jetliner to crash in Wales. MPC delivered visual effects for the Israel and plane crash sequences.
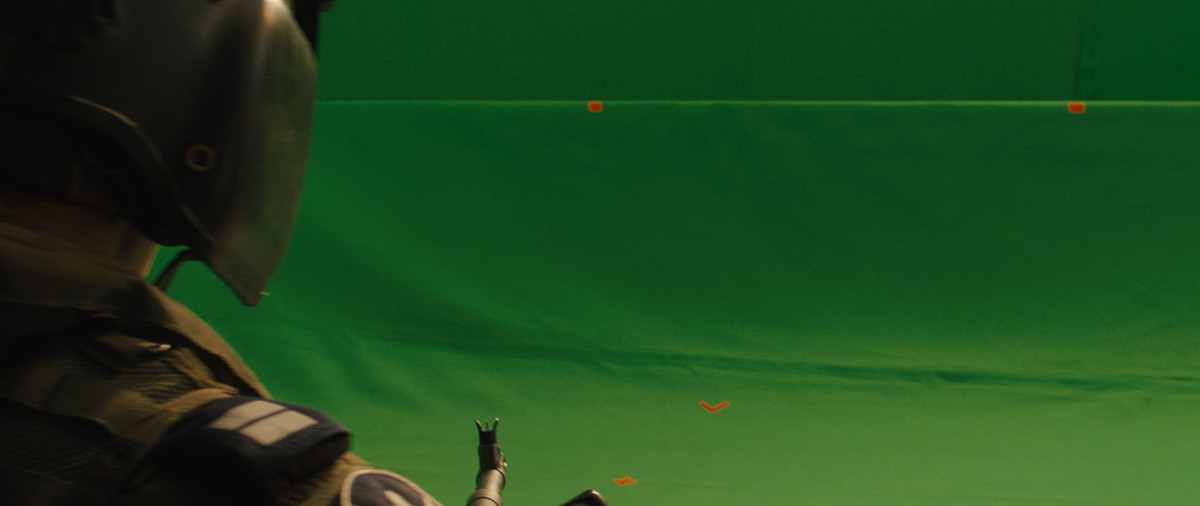
Original plate.
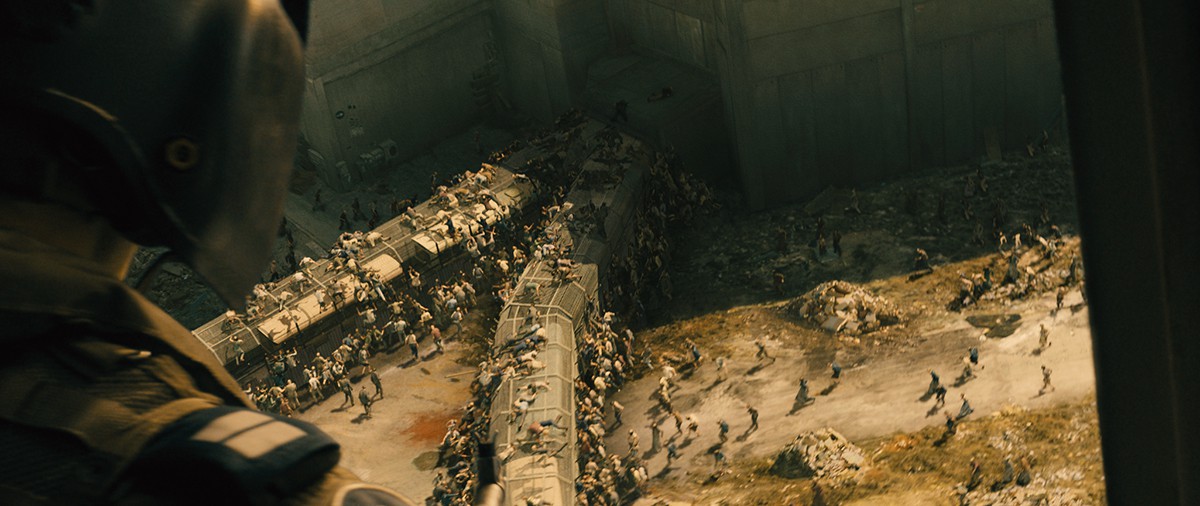
Final shot.
Jerusalem
In what have become some of the film’s signature shots, the zombies congregate outside the gates of Jerusalem before forming these massing shapes, a task MPC tackled by looking to concept art, animation reference and plates shot in Malta. “Early on we were talking to the animation supervisor Andy Jones who was helping to work out how did the zombies move,” recalls MPC visual effects supervisor Jessica Norman (who also worked with MPC supe Adam Valdez on the film). “How did they run, were they a lot faster? What’s their arm positioning, how do they react? We saw artwork early on with pyramids and how the mass of zombies create these shapes because they’ve got no fear or pain, so they don’t mind bashing against each other.”
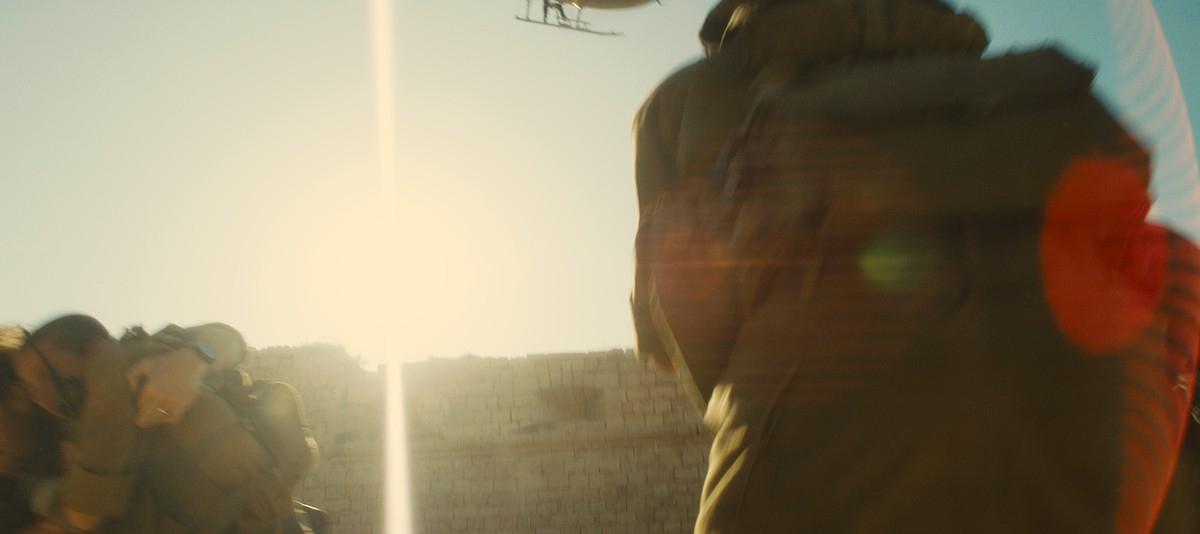
Original plate.
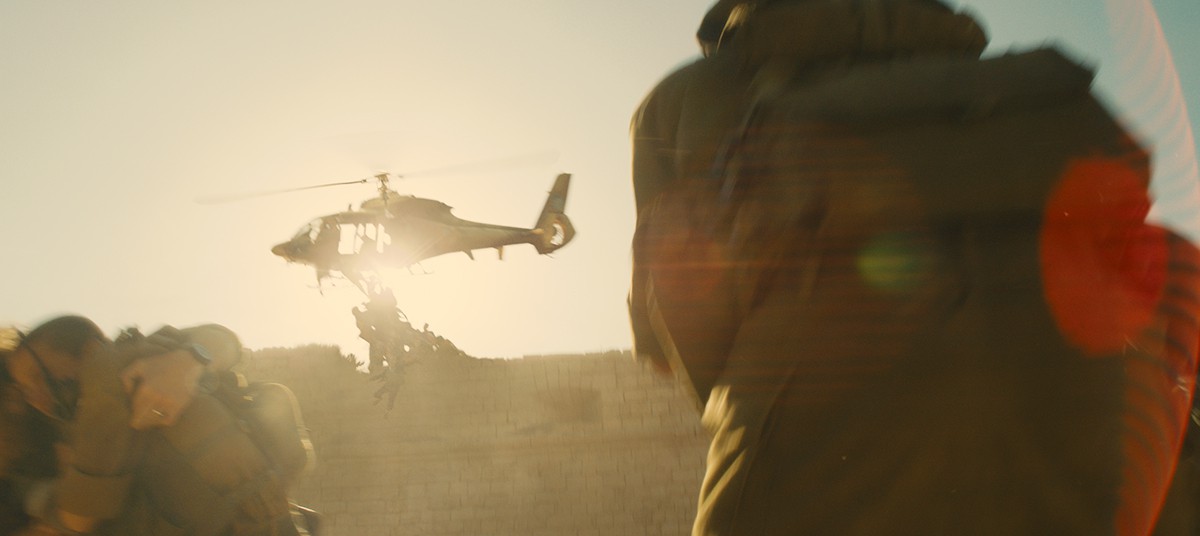
Final shot.
The digital zombies were modeled via scans and reference photography (see below) in MPC’s Maya and RenderMan pipeline. Over 3,000 different wardrobe outfits that could be mixed and matched were created for the zombies.For the pyramids, in particular, MPC would block out movements with geometry first to get a rough feel for the animation based on previs and the mocap that had been shot. “We had mocap of guys climbing on a ramp and falling,” says Norman. “Then when we built the pyramids, the clips would be put on them based on the angle needed, and then we used a lot of animated vignettes. There was also a lot of keyframe animation.”
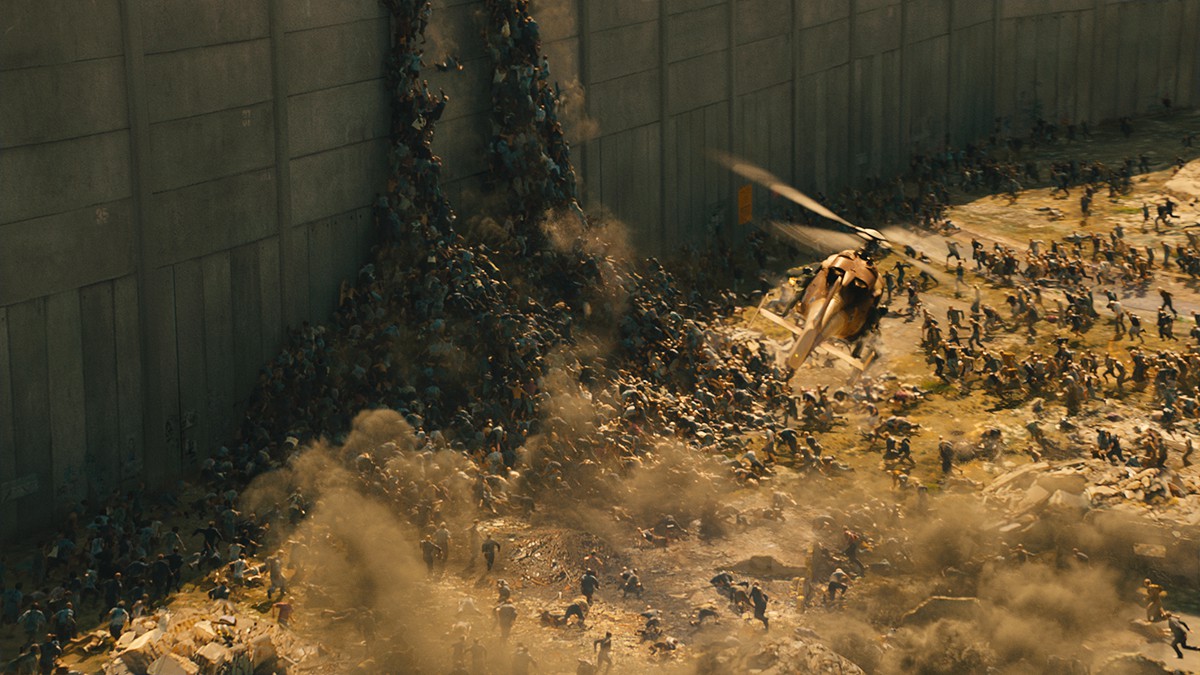
The zombies form a pyramid to try and get over the wall.
“Typically in a crowd you would have agents avoiding each other,” adds Norman. “We couldn’t quite do that because they’re basically all in the same space – folding onto each other. So in a lot of the shots we were working on too many to start with, then having scripts on them to remove the characters that are intersecting or in the same place.”
That necessitated developments to MPC’s in-house crowd tool ALICE, which works hand-in-hand with their rigid body dynamic solver PAPI, especially for shots of the pyramid of zombies as it collapses. “We also improved ALICE to create a rag-doll system where you could have a partial rag-doll on an agent,” says Norman. “You could have a clip running of the whole guy, but just part of the body like an arm would be a rag-doll. So if one of the agents ran into a wall he would react to that wall partially as a rag-doll. We also made it so you can go from clip to rag-doll to recovery,” continues Norman. “It would move the joints appropriately to have zombie falling off the wall, landing, through PAPI and then have it move into position to match the position of a crawling guy.”
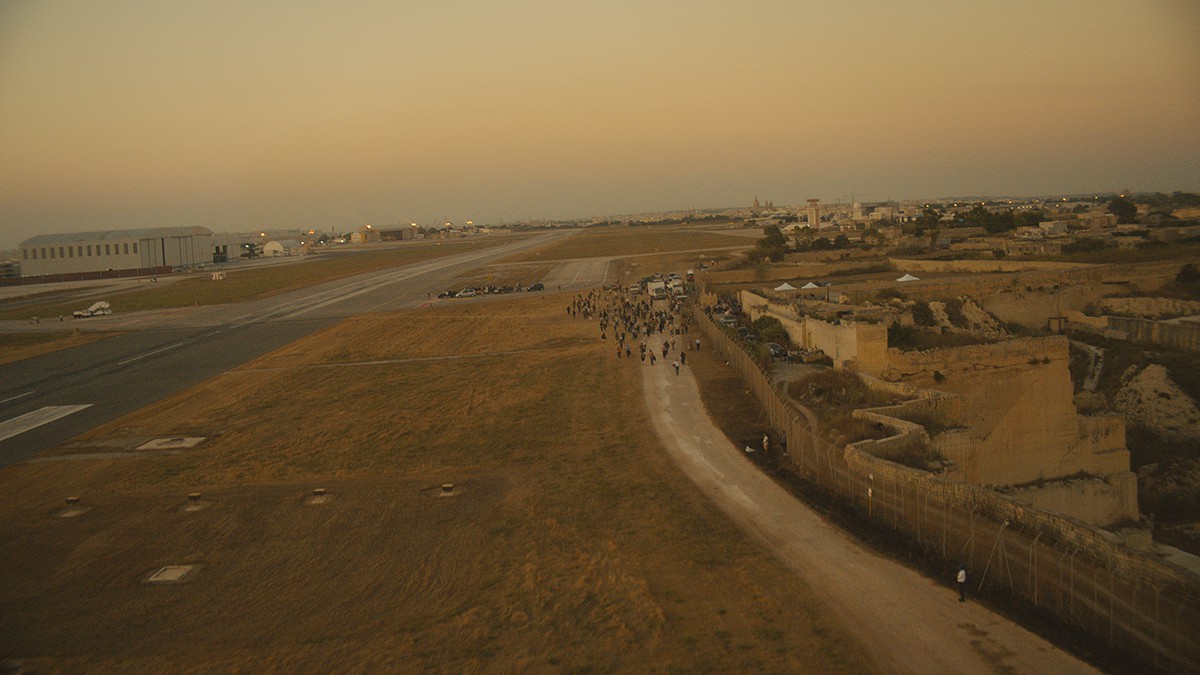
Original airport plate.
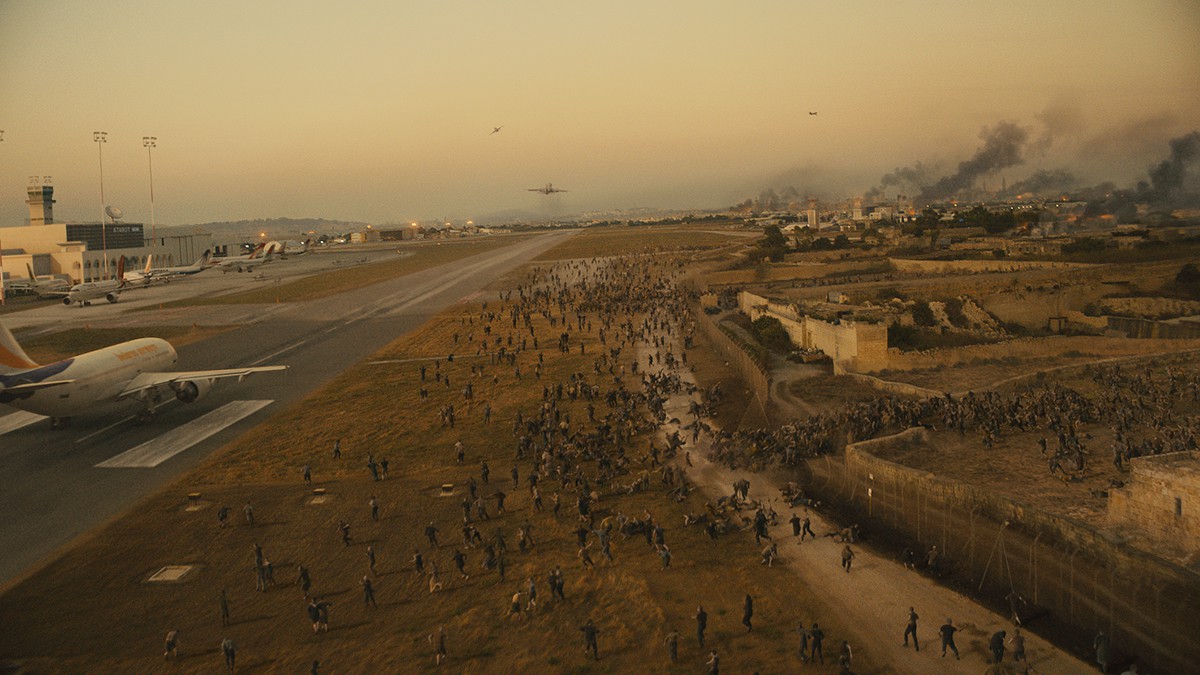
Final shot.
For more shots of a ‘sloshing’ horde of zombies coming down a street, MPC utilized a rig which was essentially a 3D volume that could be controlled and allowed for the placement of crowd agents as a first blocking pass. A similar scene has the zombies combining so much that they push a bus over (see more on this below) – a practical stunt filmed in Malta and completed with digital zombies, which sometimes came close to camera. “If they came close to camera,” says Norman, “we’d promote them from our crowd system, pick them up in animation and tweak them for the facial performance.”
In addition to the ‘zombie tsunamis’ in Jerusalem, MPC delivered environment extensions, a helicopter crash and several shots of the airport and taxiing aircraft. There were also 2D augmentations done on live action zombie actors to give them additional emotion, veining and eye treatments, and occasional re-times to accentuate moves.
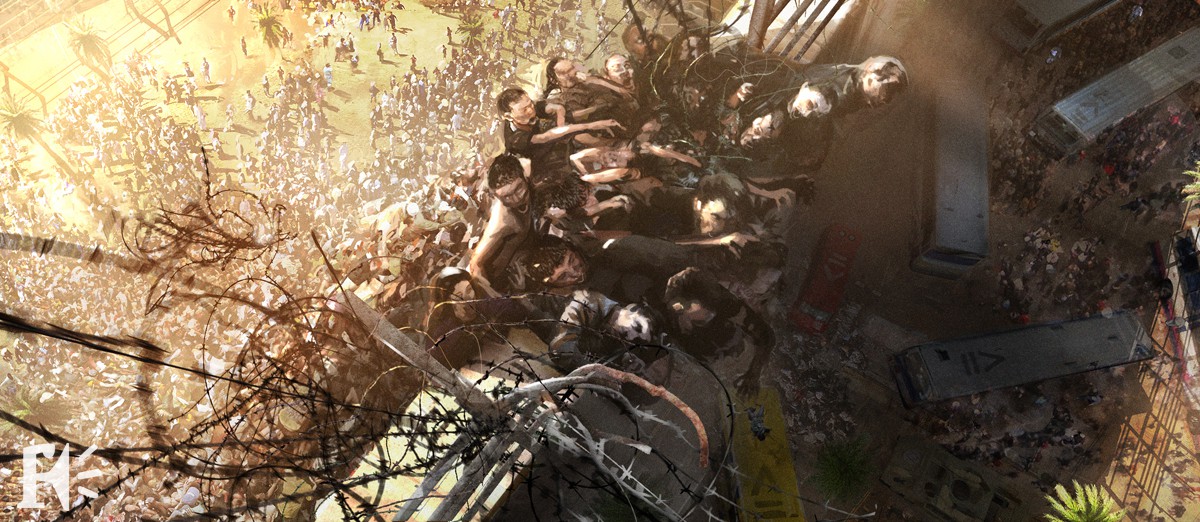
Framestore’s Art Department contributed concept designs to World War Z, including for the Jerusalem scenes.
The plane crash
Escaping Jerusalem with an Israeli soldier and a plane-load of passengers, Gerry heads to Cardiff, but not before a zombie wreaks havoc. In desperation, Gerry tosses a grenade that blows out the side of the plane as humans and zombies fly through it. The stunt was performed with several wire pulls but then enhanced with MPC digi-doubles that whiz by camera. “We wanted to create this messed up look,” says Norman. “The film is handheld and messy, and so we also wanted to have that fast movement messed up in front of the camera.”
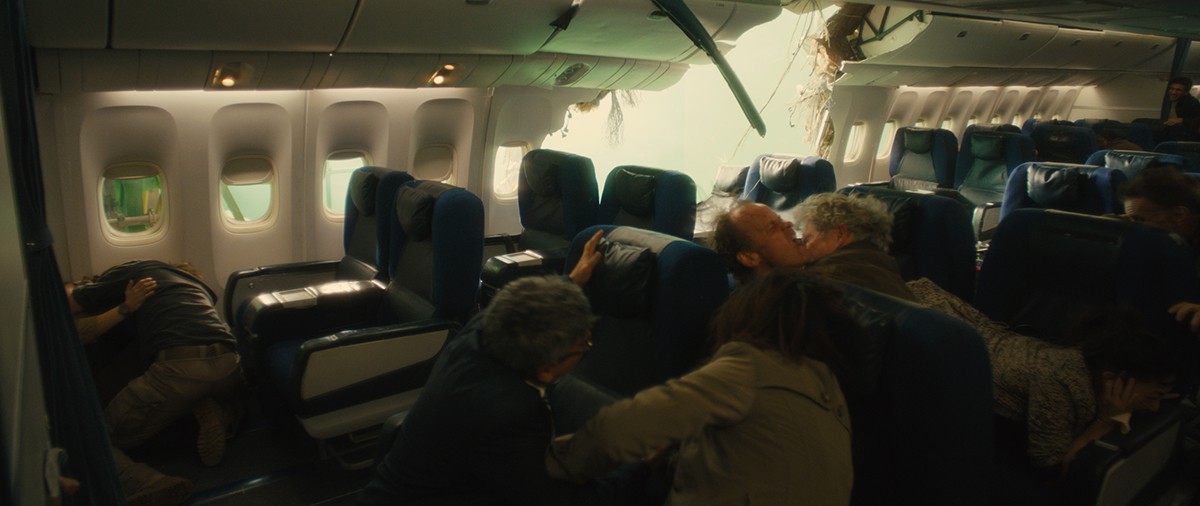
Inside the plane crash. Original plate.
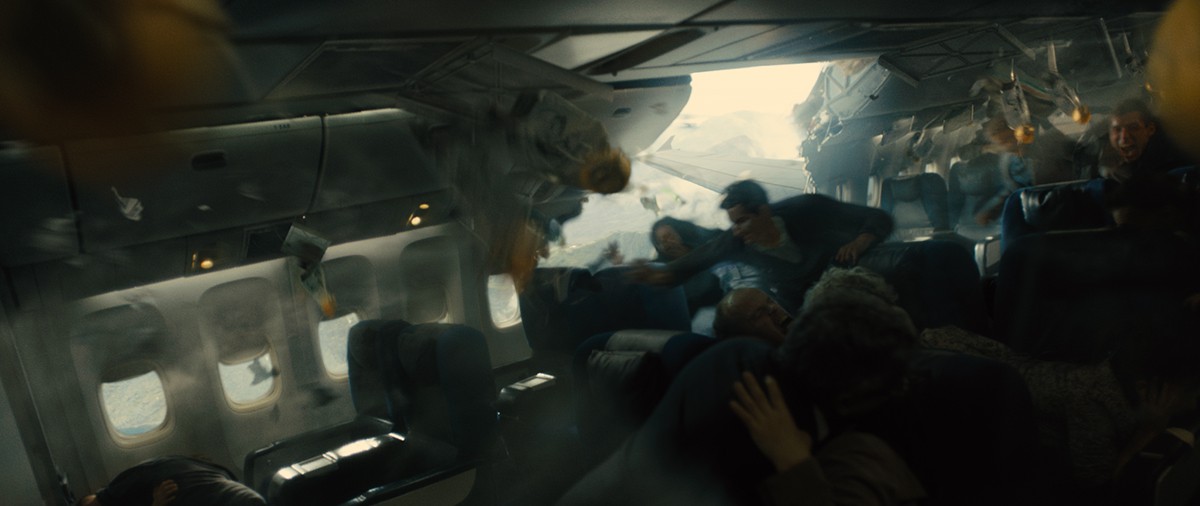
Final shot.
The damage causes the plane to make a crash landing through a forest of trees. MPC relied on its fluid sim software Flowline, along with additional particle and volumetrics work to create the destruction. “We originally built the plane not knowing it would crash,” states Norman. “So we had to change parts of the original model and do some uprez’ing and added textures and blend shapes for how the sides of plane are ripping, with lots of effects for the trees as well.”
- Watch part of the plane crash in this clip.
3. Scanning, 3D data capture and modelling: 2h3D and 4DMax
To help create the thousands of digi-double zombies and to realize them on the location sets or CG environments, Cinesite and MPC enlisted the help of companies including 2h3D and 4DMax. We take a look at the work of these two vendors involved in scanning and data capture.
2h3D
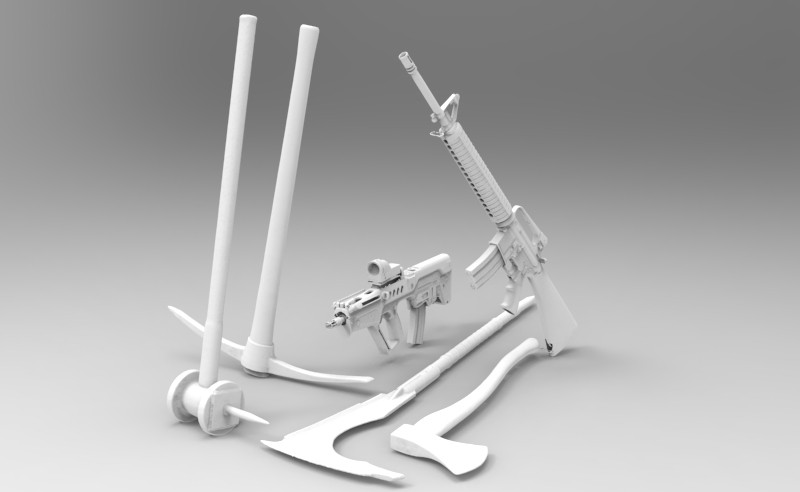
Weapon scans. Image courtesy 2h3D.
2h3D completed digital capture of assets for the film, including sets and locations, bodies, costumes, vehicles and props. The company was on-hand at locations in Malta, Hungary, Scotland, England and at the Shepperton and Elstree studios. Here’s a breakdown of their location-based work:
Malta: 2h3D director and head of scanning Guy Hauldren says, “LIDAR scans were made of a multitude of key locations, including the network of streets and alleys in Valetta, the entirety of the Busland set which even stretched the 300m range of the scanning system, the airport, Fort St Elmo and Fort Ricasoli. The two forts in particular saw considerable action, requiring the sets to be scanned twice before and after. Also scanned were a ‘hero’ bus to provide a collision object for the scene where zombies overturn it, and a Dauphin helicopter for the crash scene at Fort Ricasoli, along with various set elements, fences, checkpoints, cars and assorted debris.”
Scans of props were also made and included M16 and Tavor assault rifles, plus military equipment. Body scans were made of extras and stunt performers both in body stockings and full costumers. “The youngest actor scanned was around 6 years old, the oldest being in her 70s!,” says Hauldren.
Glasgow: For Glasgow locations (that would double as Philadelphia), 2h3D scanned George Square with LIDAR, along with zombie extras and stunt performers.
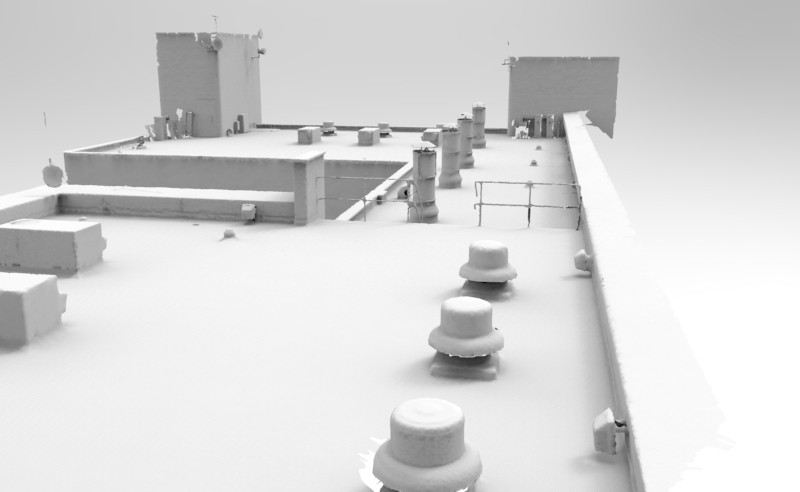
Apartment rooftop mesh. Image courtesy 2h3D.
Hungary: Scanning took place at the deserted Tin Factory on the outskirts of Budapest. “A large square in the center of the factory complex and a long street nicknamed ‘The Meatgrinder’ were selected to be LIDAR scanned in their entirety,” states Hauldren. This was combined with the scanning of around 100 extras and stunt performers both in and out of costume, plus a large variety of improvised weaponry that the defenders utilized in their defense against the zombie onslaught.”
Falmouth: Additional scanning work by 2h3D involved the main deck and upper gantries of the RFA Argus at Falmouth (this was used the escort of the refugee fleet that Gerry and his family escape to).
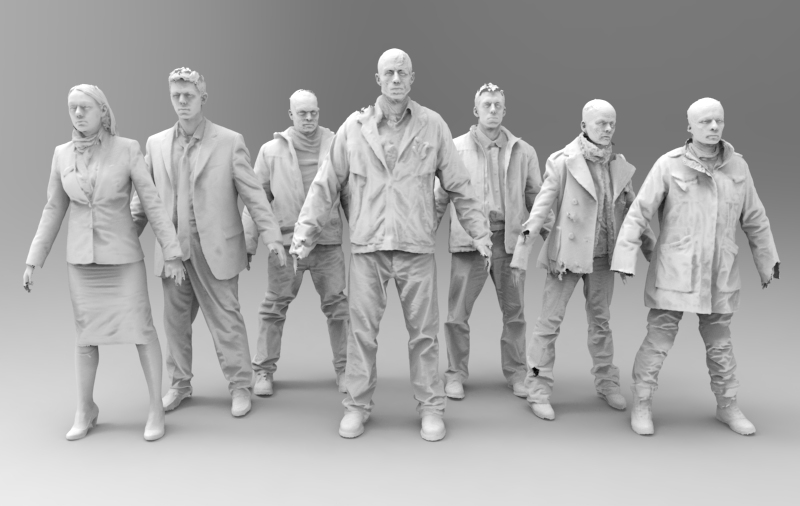
Costume meshes. Image courtesy 2h3D.
Shepperton Studios: Further studio scans of the interior of the airbus, passenger and zombie extras and baggage took place for the grenade explosion sequence.
Bracknell Forest: This was the location of the airbus crash, which was also LIDAR’d for crash elements and the debris field.
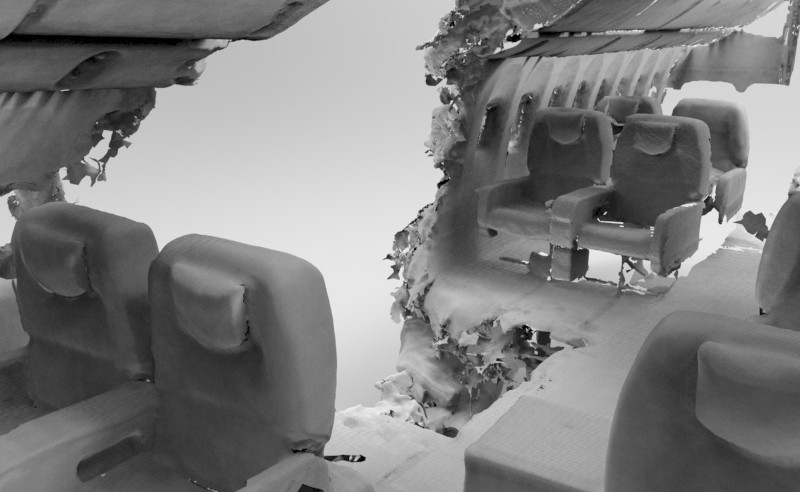
Interior of plane mesh from scan. Image courtesy 2h3D
Elstree Studio: Four levels of stairwell were constructed and then LIDAR’d as part of the rooftop escape.
Aldershot: A replica of the tower block roof where the helicopter rescues Gerry and his family was built and surrounded with a green screen. “The entirety of this set was scanned,” explains Hauldren, “along with additional capture of the score of zombie extras that chase the Lane family, only to go plummeting from the roof as the helicopter makes its escape.”
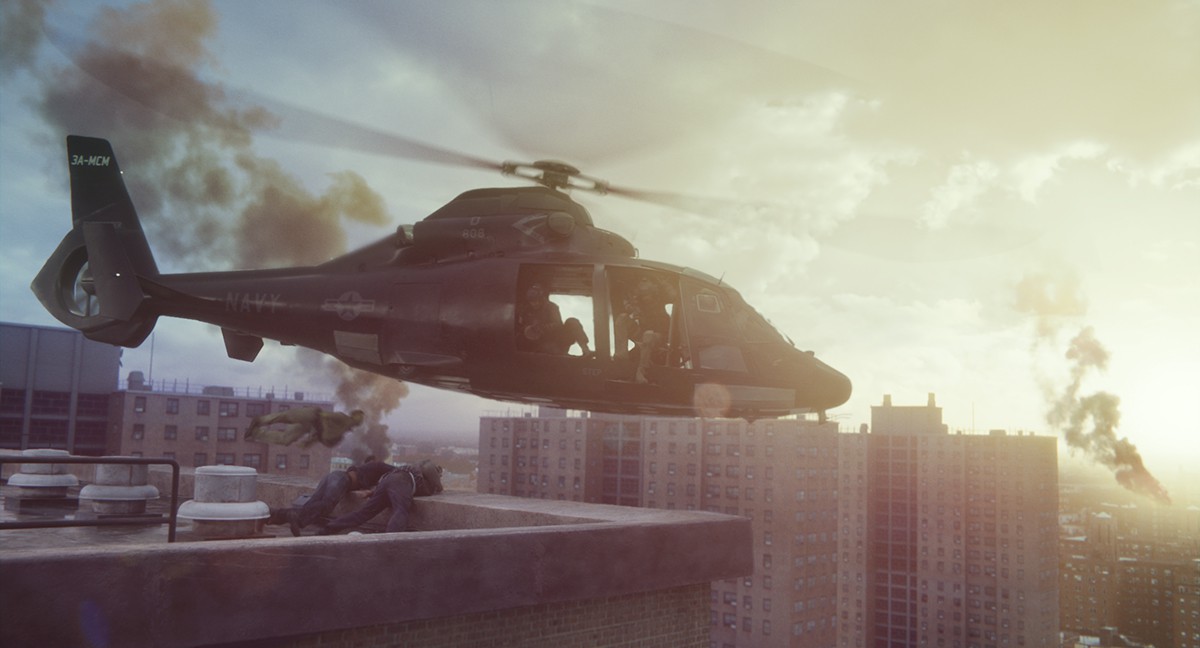
A final shot from the rooftop escape.
Heygate Estate: Here, 2h3D scanned external tower block features along with even more extras and costumes.
Dunsfold: “Usually seen on the TV series Top Gear,” notes Hauldren, “this location doubled for some of the air field shots in Korea. 2h3D worked over a number of nights to scan numerous extras in make-up and costume.”
Around 100 finished assets were delivered to MPC and Cinesite, based on scans by Hauldren and Charlie Gunn from 2h3D. Their tools included a Leica (LIDAR scanning) and Artec (body, costume and prop scanning). 2h3D worked with James Kelly at MPC and Aviv Yaron at Cinesite who were operating texture capture booths alongside 2h3D’s body and costume scanning efforts. “The steady stream of zombies and extras filed out of texture capture to scanning (or vice versa) on countless days and nights of scanning and photography,” says Hauldren, “and the combination of our geometry and their digital textures helped to create the digital doubles and textured environments that are seen in the final feature.”
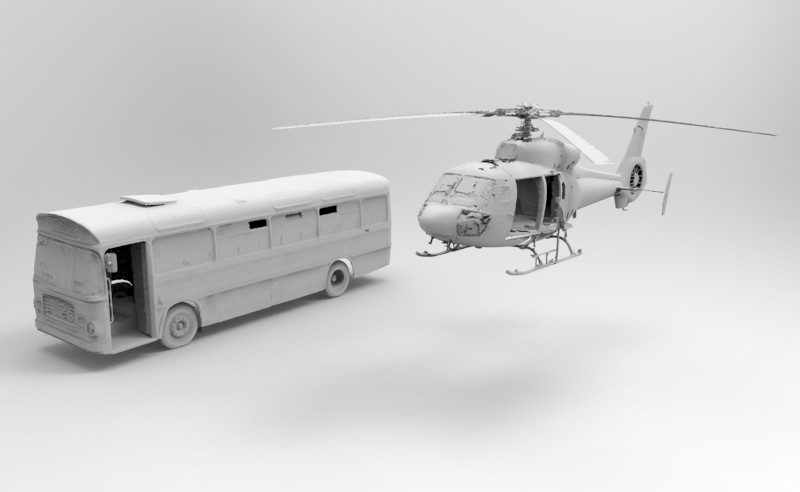
Bus and helicopter meshes. Image courtesy 2h3D
4DMax
4DMax helped MPC with their digital human and zombie work. The enormous scale of the zombie hordes required a different approach to the usual scanning and modeling pipeline. “It was simply going to be too costly and too time consuming to scan and model the thousands of zombie characters when they were on set,” says 4DMax President Duncan Lees. “Furthermore, many more were going to be needed in the digital crowd extensions than there were appearing on the shoot.”
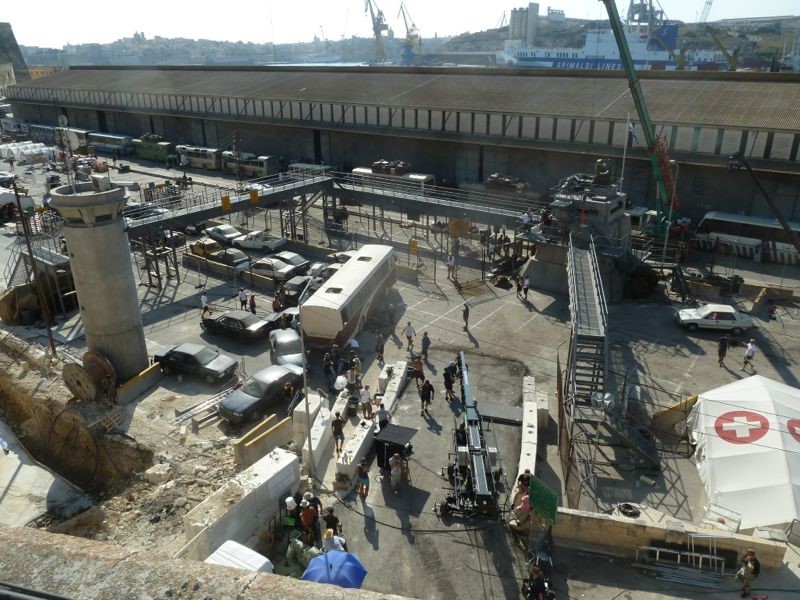
A view of the Jerusalem set of World War Z (courtesy 4DMax).
The approach, then, was to cyberscan a number of digital material swatches of male and female clothing that the MPC artists could then combine for the many, many zombies. 4DMax used Mephisto Cyber scanning systems for the task. These captured both high precision geometry, used for creating the folds of the clothing and displacement maps, and full color 6K texture maps. “Head of Operations at 4DMax, Louise Brand, used these Mephisto scanners to capture hundreds of different items of clothing and process these into individual swatches and this digital ‘clothing bank’ was delivered to the character modellers at MPC,” says Lees.
4DMax was also on-set in Malta performing 3D surveying and data wrangling work. “The daily tasks involved surveying various films sets, action movement, camera locations and witness camera locations,” explains Lees. “Rich Wills of 4DMax worked on a number of different sets in Malta including the huge ‘Bus Lands’ set. Bus Lands was the evacuation area in Israel, a huge set had been constructed in the docklands area of Malta. The work here involved creating CAD wire frame models of the incredible film set that had been constructed, using a Leica Reflectorless Total Station.”

“The set included military look out towers, gantries, huge wire mesh fences, turnstiles and lots of cars and buses,” adds Lees. “Three main camera locations needed to be surveyed along with witness camera positions, these needed to be re-surveyed for each ‘take’ and the start and end locations of the buses that get pushed sideways by the zombie horde. Giant fork lift trucks pushed the buses during filming, these were then removed by the VFX department and replaced by zombies. Dozens of cars pushed by more zombies were dragged on chains by a huge loading shovel machine and over 900 people ran in panic during filming.”
Lees notes that this movement required coordinating and as a surveyor on these kinds of sets, 4DMax needed to be quick and able to set up in many different places and be prepared to move. “All scenes required quick and accurate surveying and data needed to be delivered quickly once completed,” he says. “The data format needed to be used in Autodesk Maya software and the data needed to contain all the correct information, including scene number, take and location.”
4. Stereo conversion: Prime Focus
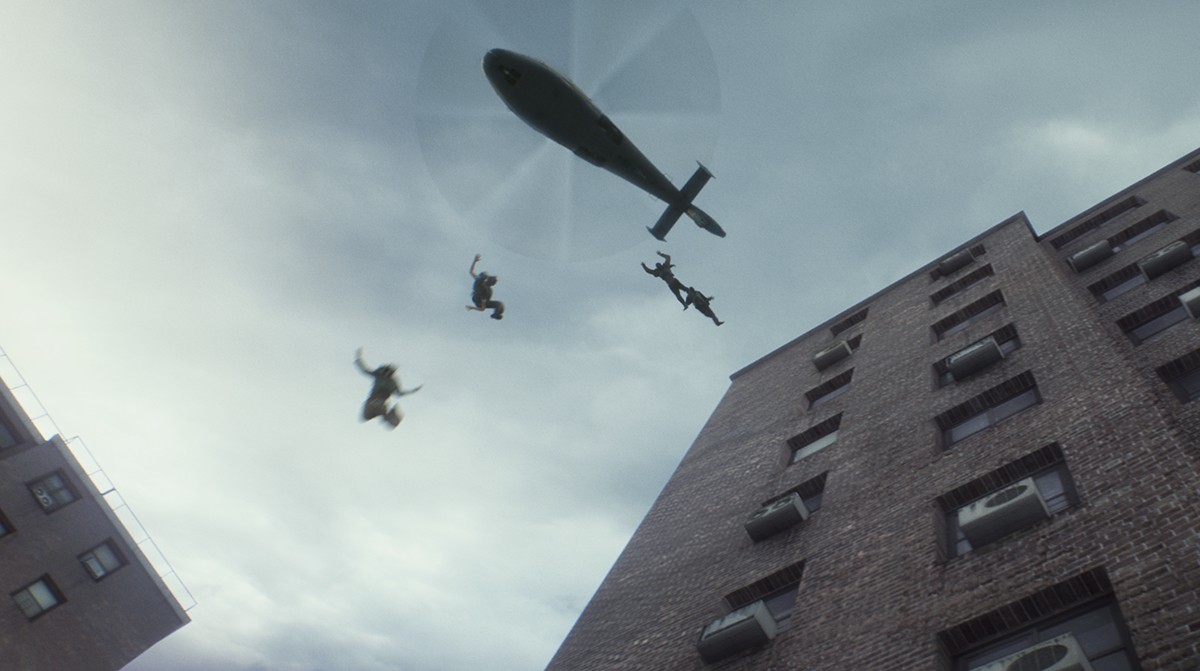
A shot from the roof escape. VFX by Cinesite.
Prime Focus was the lead post stereo conversion house for World War Z, under the supervision of Paramount’s VP Post Production, Corey Turner, delivering over 2000 shots with its proprietary View-D process and artists working in London and Mumbai. Cinesite also completed stereo conversion of visual effects shots.
“It was all about depth to enhance the narrative impact and emotional arc of the film, and equally to make the audience feel it,” says Matthew Bristowe, Senior VP, Production, View-D. “There’s nothing conservative about the depth in the film.”
“In the opening scenes where the camera is lingering longer, it was an opportunity to play more depth into those moments,” adds Richard Baker, Prime Focus’ Creative Director & Senior Stereographer. “Then in the crazy zombie moments we would bring in the depth for the zombies that fly in and things we could play into negative space. The depth is deep consistently and then played up in certain moments of the film.”
Prime Focus’ View-D system relies on Fusion as its backbone, although the tools have also been ported to Nuke. “The main reason for that is that Fusion is better for handling large amounts of roto splines and polys,” says Baker.

A new development on this film was the addition of 3D geometry and assets into the pipeline in addition to the roto spline-based tools. “So for Brad Pitt, we actually modeled his head in geometry which we could use for a lot of mid-shots of him,” explains Baker. “Nearly all those shots we used the head geometry, and we can plug that into our tools and the artist can animate geometry for the head to get more exact stereo. It’s actually a little bit quicker. For me it’s consistency – his head will always look good.”
While the lead actor’s stereo moments were always crisp, Corey Turner suggested to Prime Focus that the zombies could be somewhat more distorted. “We would maybe pick the head a little off the shoulders, because it plays well, whereas that would look wrong for Brad,” says Baker.
In terms of signature sequences, Baker notes that conversion of the shots of thousands of zombies crawling over each other were incredibly challenging, “even if you get depth maps for those. There’s so much going on in those shots but to make it look really clean to make it look right, right on the edges.”
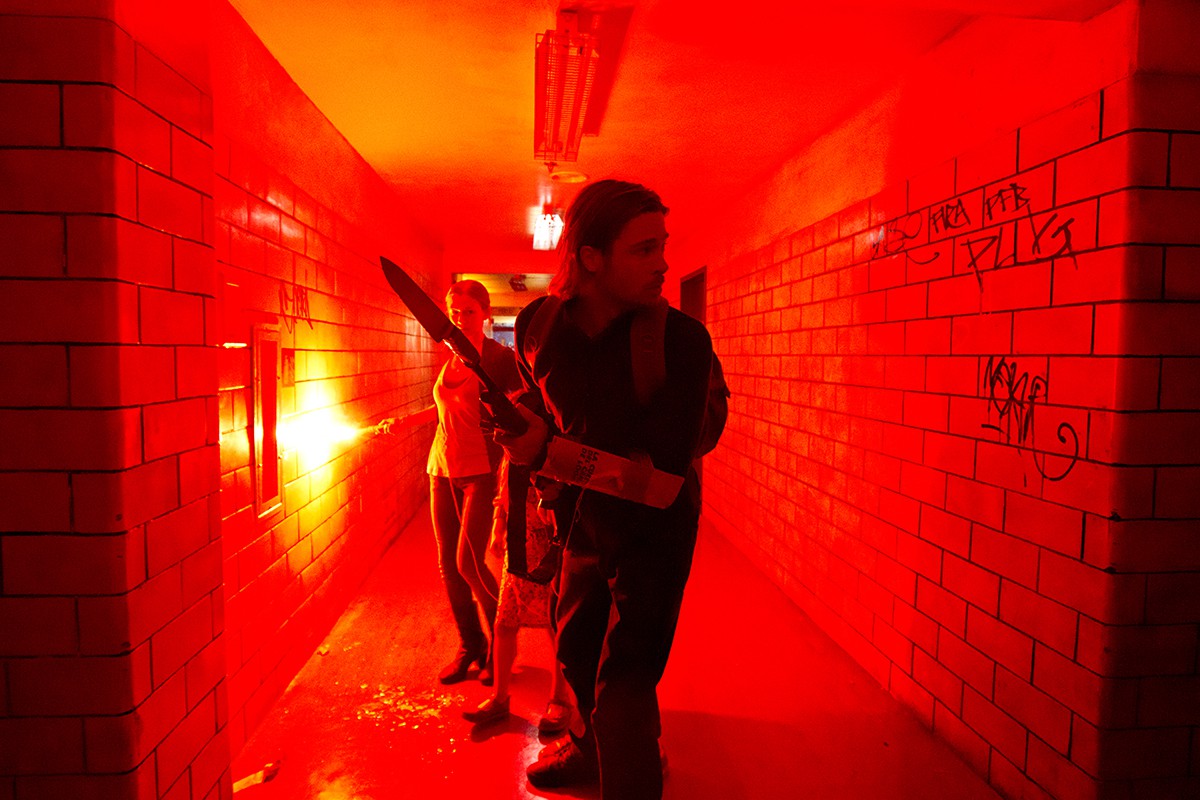
Inside the apartment building.
But the most satisfying shots for Baker involved scenes at the Korean military. “Brad is with the NAVY SEALs and there’s an environment with lots of ash,” says Baker. “There were a lot of in-camera particles floating around in some of the shots but not all of them. I presented to Corey a couple of shots where we actually created particles throughout the length of the shot that had floating particles in negative space – 40 or 50 pixels negative. So it was really nice to enhance a scene and add to it like that.”
Similarly, Bristowe’s most memorable conversion scene did not necessarily involve the zombies. “My favorite scene is where Brad and his family are holed up in an apartment block which is a really tense sequence. There are lots of long corridors and there’s a sense of danger, which I think is better in 3D. You feel the tension more.”
All images and clips copyright © 2013 Paramount Pictures. All Rights Reserved.


 A Dreamworks, ao contrario de todos os outros estúdios de animação, sempre foi conhecida pela sua quantidade acima da média de lançamentos por ano, agora ela acaba de divulgar a lista de suas próximas animações, até 2016.
 Umas das grandes novidades dessa lista é a data de "Como Treinar o Seu Dragão 3", flime que todo mundo já esperava que seria lançado mas essa é a primeira vez que o estúdio fala oficialmente sobre o fechamento dessa trilogia.
 E não esqueçam: o